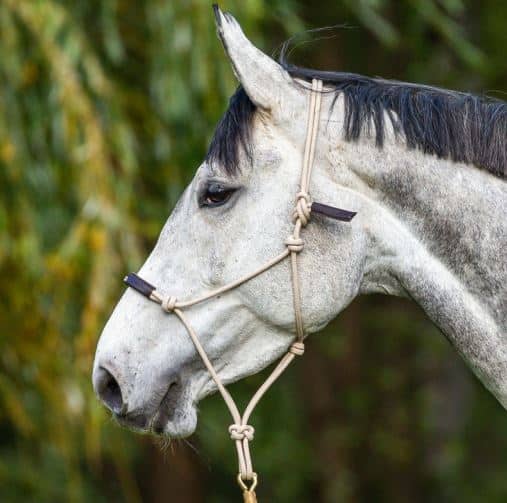
The ethological halter, also called the American halter, is a knotted halter made from rope. It is a tool that allows you to work your horse on foot or mounted. The nodes are placed in different locations, which represent pressure points on your horse’s head.
Thanks to these pressure points, your horse will obey your requests to escape these pressure effects on his head.
Easy to make, these ethological halters can be purchased commercially or from independent designers, or made yourself.
They are accompanied by an ethological lanyard of approximately 4 m.
What preparations are needed to make your ethological halter?
Before you start making your ethical halter, you need to make some preparations. First of all, take the measurements of your horse’s head, or take as a model a classic halter already adapted to its morphology. To make making your ethological halter easier, use a support that will allow you to place the halter as if you were passing it over your horse’s head. This will help you find your way and tie the knots in the right places.
The necessary equipment :
– The rope of your choice, knowing that you need approximately 7 meters of rope for an ethological horse-sized halter. The chosen rope must be relatively flexible and have a diameter of approximately 6 mm.
If you want to decorate the noseband of your halter, you can also get ropes of different colors. You can find this type of rope in a DIY store or sports store in the hiking section.
– One meter, to space the knots the correct distance.
The steps in making your ethological halter
For a standard horse halter size, start by laying your rope flat, and measure 140 cm from one end. Tie your first simple knot, not completely tightening the loop, then double the rope in a second step. It will therefore pass through the knots again, hence the need to keep a little margin. After this first knot, measure 20 cm and make a second knot. Then measure 14 cm and tie your 3rd knot. This knot will serve as a ring to hang the lead of your halter. You must therefore make a large loop (around 15-20 cm), which you will close, always without tightening too much. After this loop, measure 23 cm and tie a new simple knot. And finally the last knot, which will be tied 24 cm from the 3rd knot. Next, you will create the noseband, by passing the rope back through the attachment knot, lining the entire knot with your rope. The distance between your 4th knot and the attachment knot must therefore be 23 cm.
Tighten this loop tightly by slipping the knot. Then double the rope to the second knot, in which you will also double the starting rope. Tighten the knot as you slip it, then make a loop like you did for the attachment ring.
Check that this loop is at the same level as your 1st knot so that everything is symmetrical. Then measure 20 cm and double the 4th knot, then go back to the 3rd, still doubling the rope. With the remaining rope, all you have to do is double the very first knot. The distance between these last 2 knots must be the same as the opposite amount of the halter. To get your bearings clearly during the progression of the halter, do not hesitate to rely on a “classic” halter to respect the distances and keep everything symmetrical. Cut the remaining rope so that it is the same length as the other end of the rope.
The measurements mentioned are “standard”. However, to adapt the setting of your ethological halter to your horse, these measurements may need to be recalculated. Do not hesitate to take help from online tutorials, there are many videos on the subject. As a reminder, the ethological halter is a working halter, only use it in ethological riding sessions with your horse, but in no case at the tie. The rope being a very strong material, it will not break if your horse pulls, unlike metal rings or carabiners. This could therefore cause permanent or even fatal damage to your horse.